
IG902上传数据到MQTT云平台EMQ(1)
-

-
yandongjie 这家伙很懒,还没有设置简介
0 人点赞了该文章 · 5146 浏览
EMQX 是全球领先的开源物联网MQTT 5.0服务器,高并发、低延时,内置强大的规则引擎,支持边缘及云端部署,是5G时代大型物联网应用首选技术方案。IG902边缘计算网关,可以通过MQTT协议接入EMQ服务器,帮助您快速搭建IIoT计算方案。
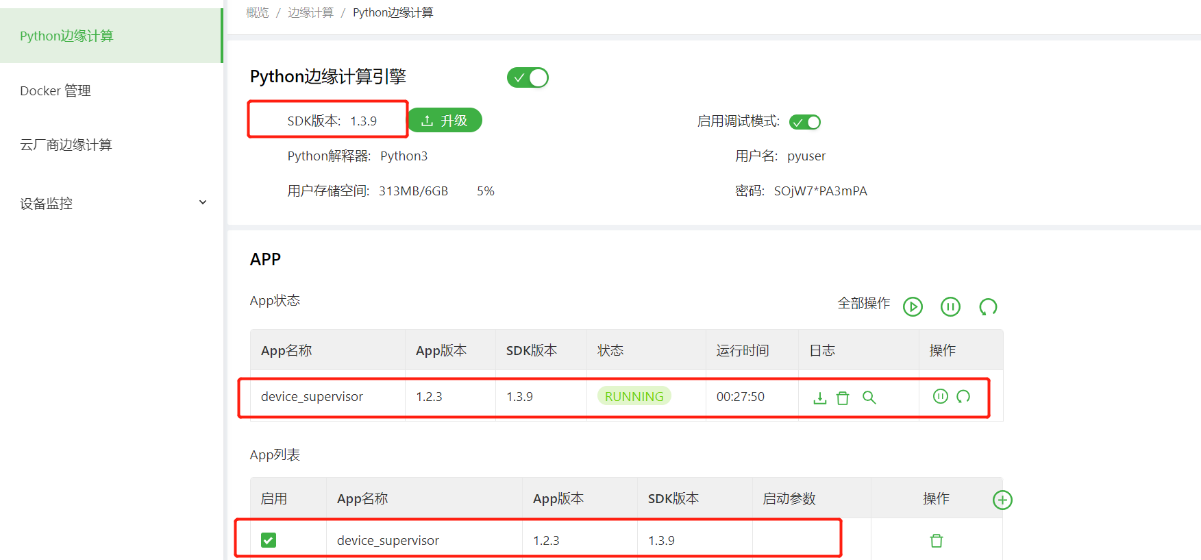
1. IG902初始化配置
1)开启边缘计算安装相应APP device_supervisor并启动APP。
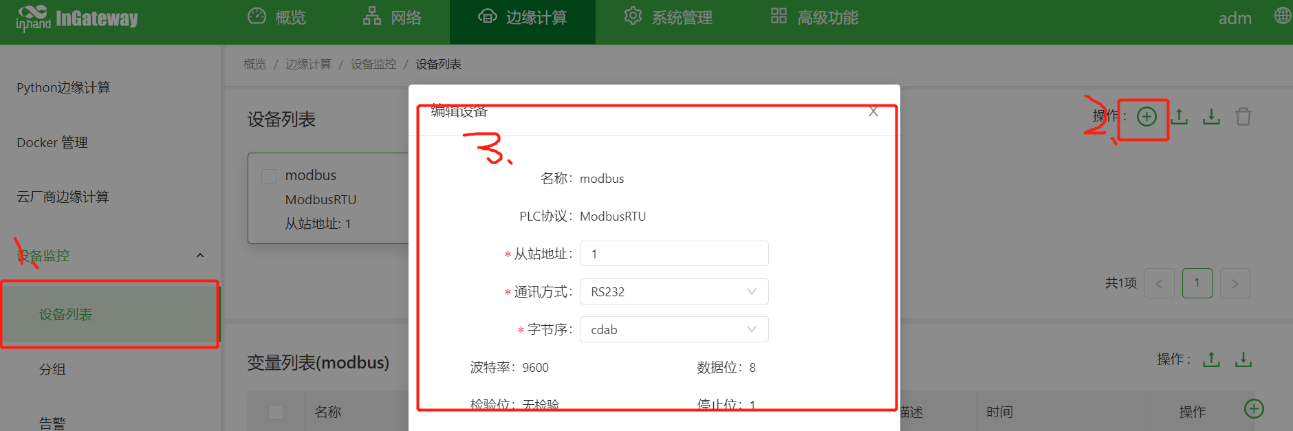
2)添加设备选择右侧栏目设备监控-》设备列表右上角操作中的“ ”号添加设备。
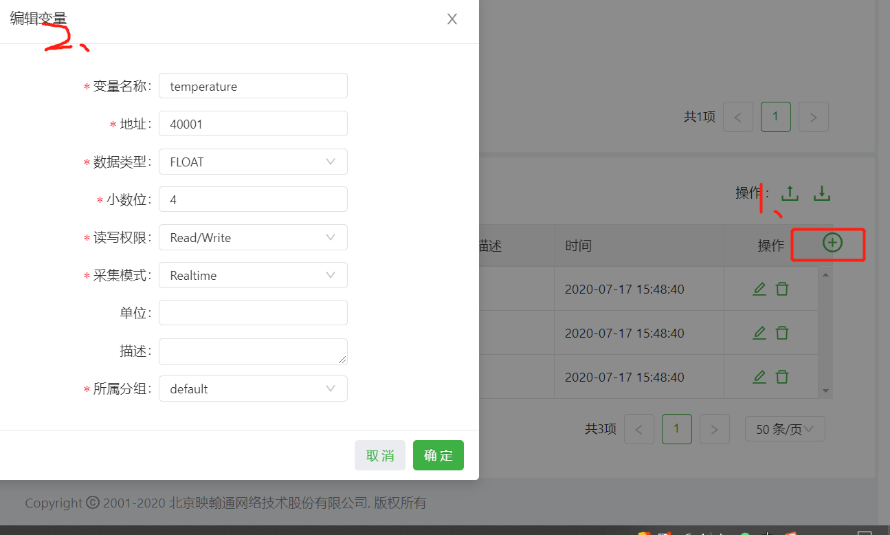
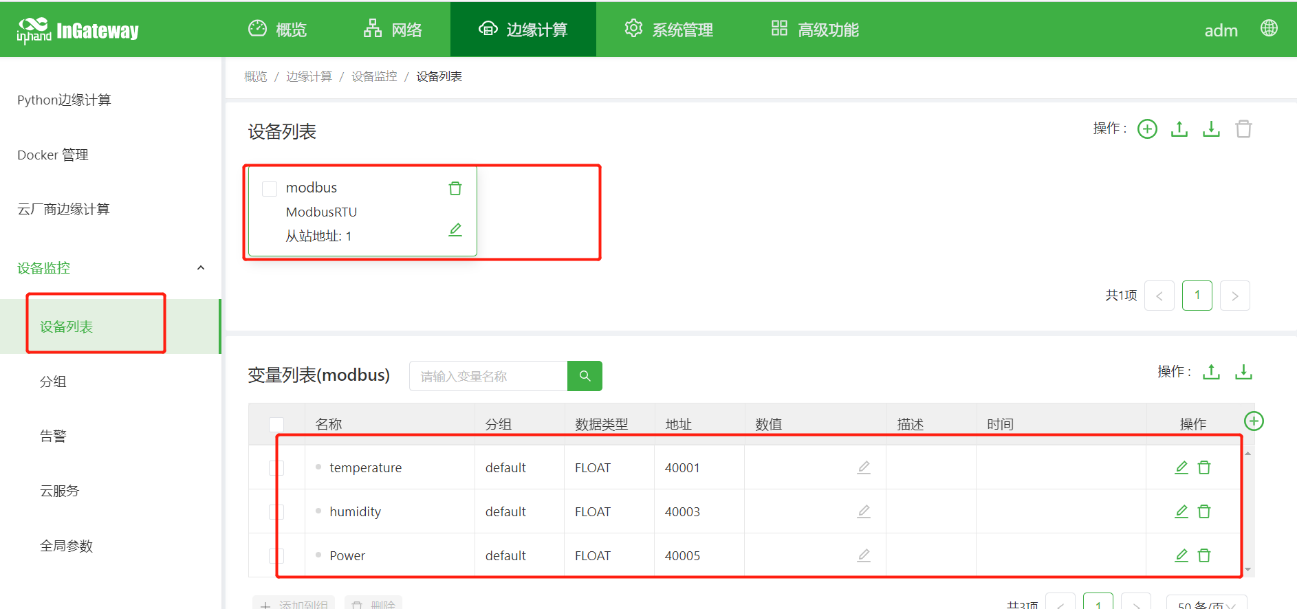
3)添加变量
2.模拟传感器数据上传:
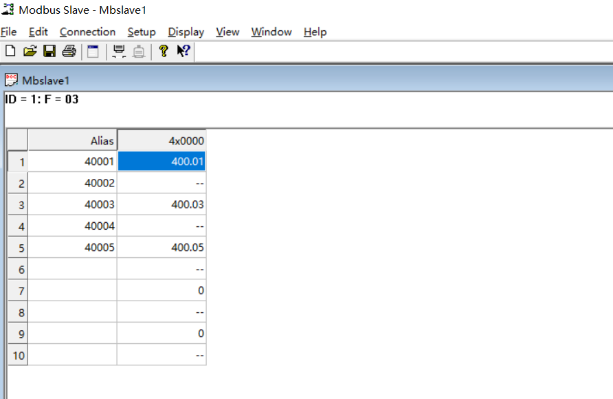
1)使用软件modbus Slave
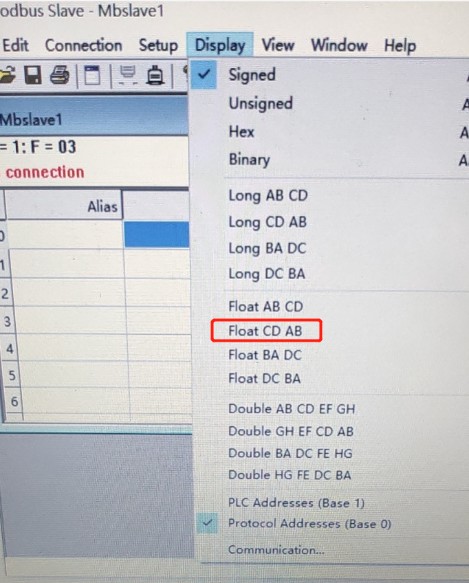
2) 添加模拟数据
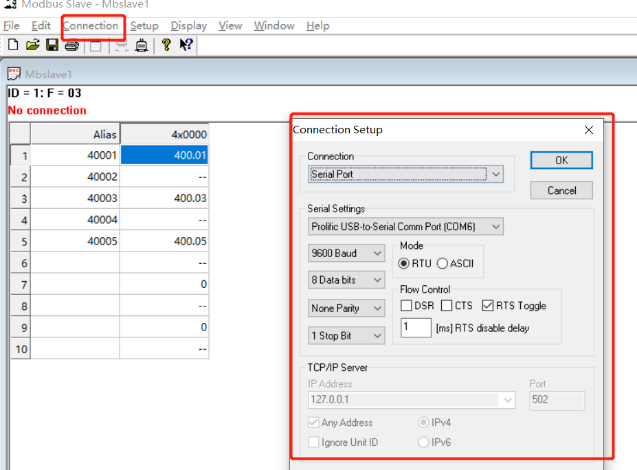
3)启动数据发送connection-》connect
3.配置设备云服务及搭建EMQ服务器
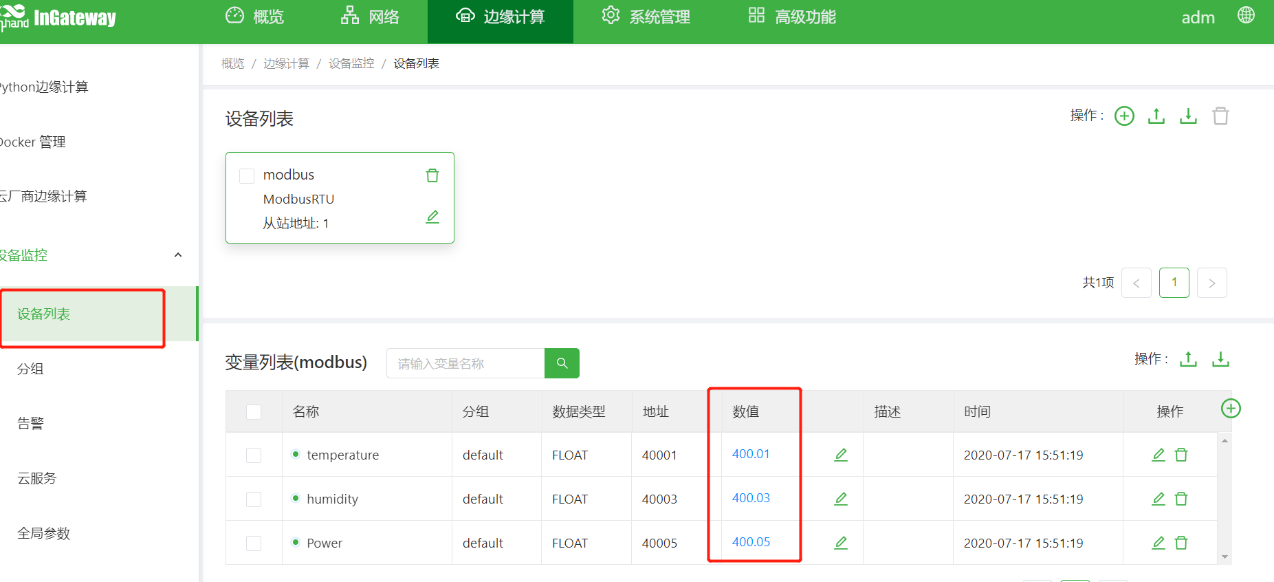
1)在IG Web端查看接收数据
4.搭建EMQ服务器
1)下载链接 https://www.emqx.io/cn/downloads#enterprise
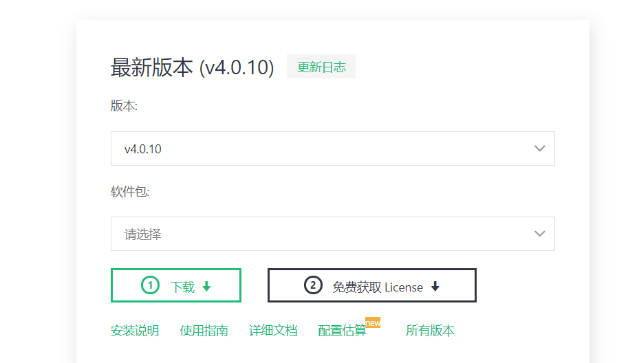
2)以Linux系统为例注册账户下载免费的license 文件,替换etc目录下的对应文件。
3)安装目录bin目录下启动系统 通过./empx start命令启动。

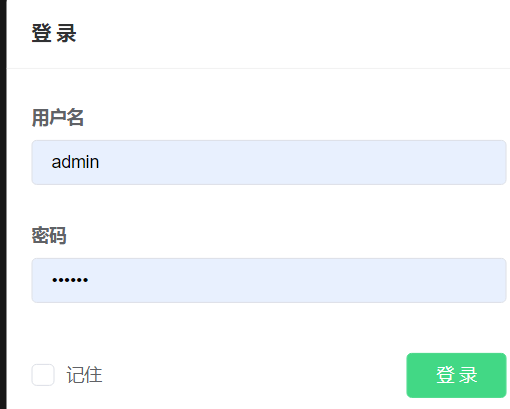
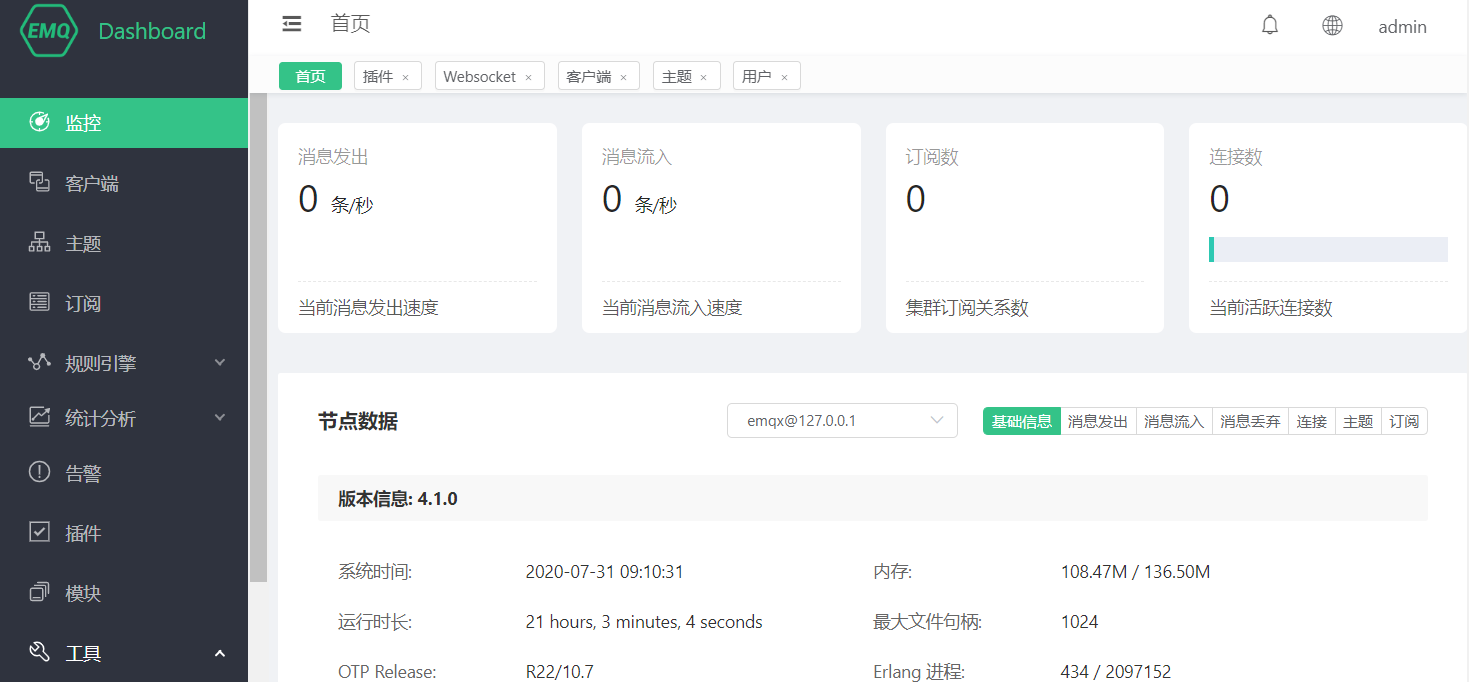
4)浏览器访问http://服务器地址:18083/#/login 输入用户名和密码用户名admin 密码public登录管理页面
5.EMQ平台配置用户名认证
1)关闭匿名登录
配置匿名认证开关:

# 修改etc/emqx.conf

## Value: true | false

allow_anonymous=false

方式一:

修改etc/plugins文件夹下的

emqx_auth_username.conf文件

# etc/plugins/emqx_auth_username.conf

auth.user.password_hash = plain

## 第一组认证数据

auth.user.1.username = admin

auth.user.1.password = public

## 第二组认证数据

auth.user.2.username = test

auth.user.2.password = test

启动认证服务

./emqx_ctlplugins loademqx_auth_username或在web界面开启服务

重启emqx服务

./bin/emqx stop

./bin/emqx start

查看运行状态

./bin/emqx_ctlstatus
方式二: 1)安装mysql 数据库
mysql安装

检查系统本身是否有预装的mysql

rpm -qa | grep mysql #检查是否安装了mysql

rpm -qa | grep mariadb #检查是否安装了mariadb

rpm -e xxx#一般使用此命令即可卸载成功

rpm -e --nodeps xxx #卸载不成功时使用此命令强制卸载)

安装

wget -i -c http://dev.mysql.com/get/mysql57-community-release-el7-10.noarch.rpm

//下载mysql的rpm的包

yum -y installmysql57-community-release-el7-10.noarch.rpm

yum -y installmysql-community-server2)创建相关表格:
>mysql –u root –p

createdatabase mqtt;

CREATETABLE`mqtt_user`(

`id`int(11) unsignedNOTNULLAUTO_INCREMENT,

`username`varchar(100) DEFAULTNULL,

`password`varchar(100) DEFAULTNULL,

`salt`varchar(35) DEFAULTNULL,

`is_superuser`tinyint(1) DEFAULT0,

`created`datetime DEFAULTNULL,

PRIMARY KEY(`id`),

UNIQUEKEY`mqtt_username`(`username`)

) ENGINE=InnoDBDEFAULTCHARSET=utf8mb4;
3) 修改文件
# etc/plugins/emqx_auth_mysql.conf

## 服务器地址

auth.mysql.server = 127.0.0.1:3306

## 连接池大小

auth.mysql.pool = 8

auth.mysql.username = mysql数据库名

auth.mysql.password = 数据库密码

auth.mysql.database = mqtt数据库

auth.mysql.query_timeout = 5s4)启动服务mysql认证服务emqx_ctl plugins load emqx_auth_mysql 或通过web管理端插件开启
注意:如果服务未启动查看报错内容解决。1.配置文件出错(检查后修改)。2.mysql未开启远程管理权限
5)添加测试用户
mysql -u root -p
usemysql;
updateusersethost=’%’ whereuser=‘root’ andhost=‘localhost’;
添加认证用户test密码test
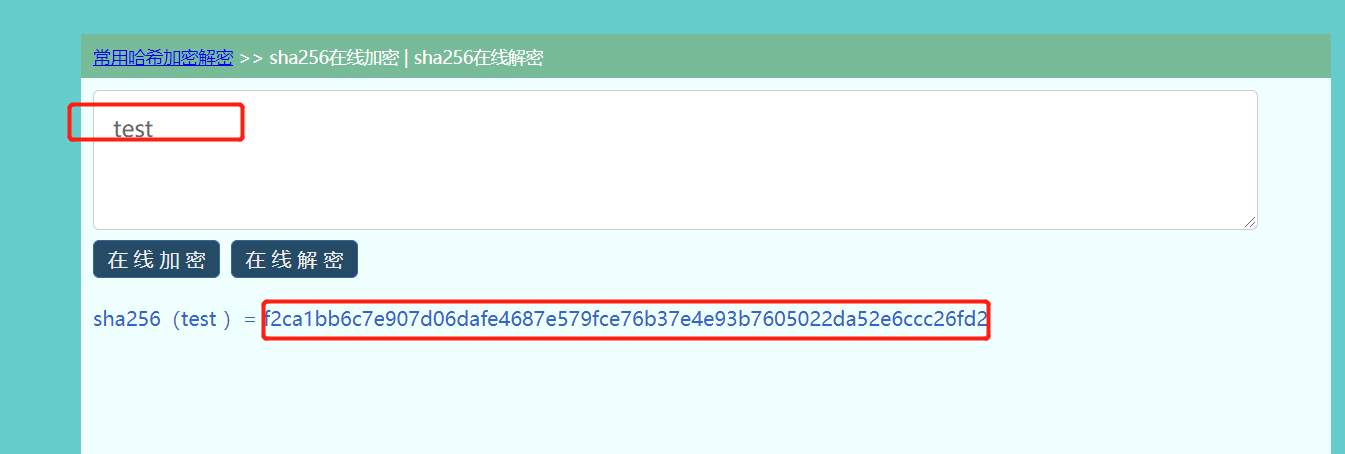
INSERTINTO`mqtt_user`( `username`, `password`, `salt`)
VALUES
('test', ' f2ca1bb6c7e907d06dafe4687e579fce76b37e4e93b7605022da52e6ccc26fd2', NULL);密码采用sha256加密
6)客户端测试使用软件MQTTX 链接:https://mqttx.app/cn/
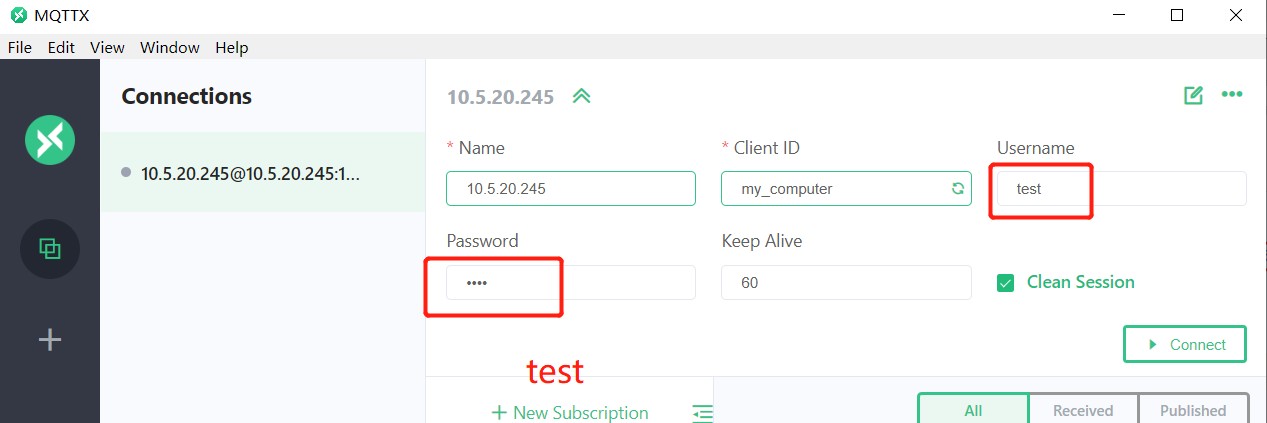
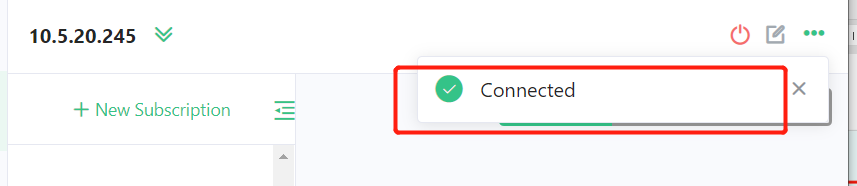
7)点击connect,提示连接成功
8)IG连接需要添加用户名密码
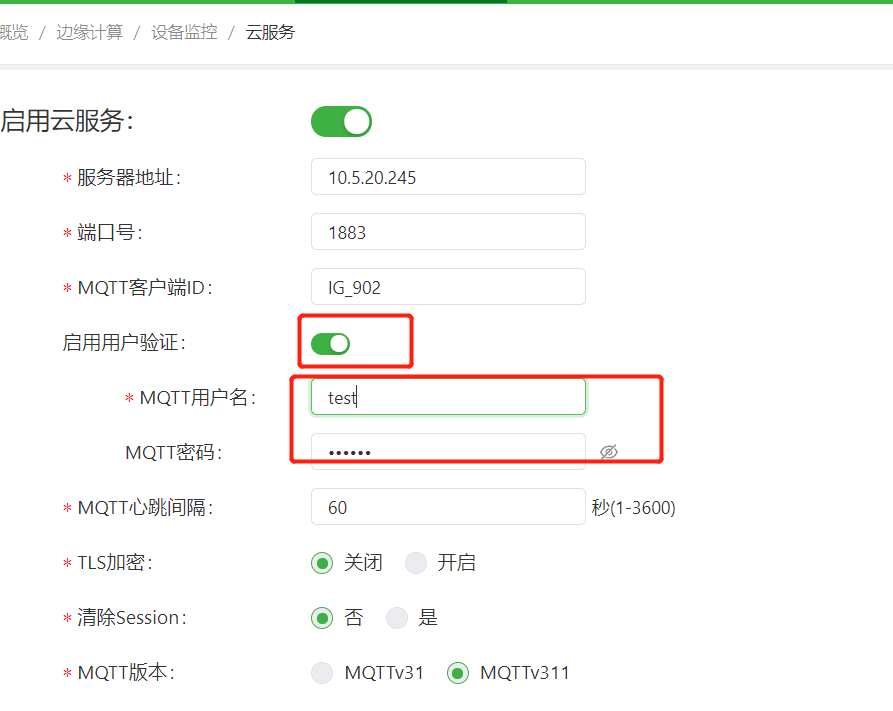
其余步骤点击链接 :http://www.m2mlib.com/?/article/303
全部 0条评论